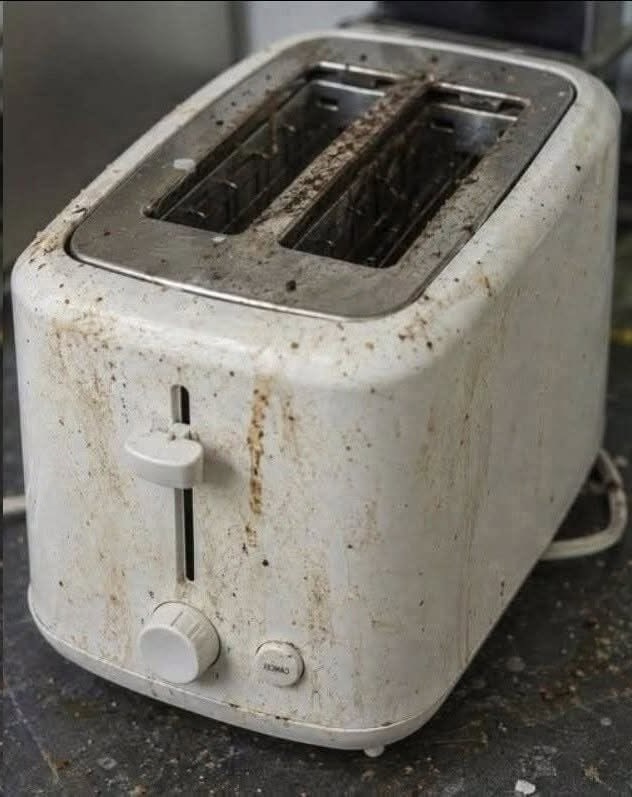
A badly neglected toaster can quickly become one of the dirtiest appliances in the kitchen. Burnt crumbs, grease buildup, sticky residue, dust, and years of grime can make an otherwise useful kitchen appliance look like it belongs in the trash.
But before you replace it, there may be a simple solution.
With the right household cleaning supplies, careful cleaning techniques, and a little patience, you can remove built-up grease, eliminate crumbs, clean stubborn stains, and give an old toaster a much fresher appearance.
This deep cleaning guide walks you through how to clean a heavily neglected toaster from the crumb tray to the exterior surfaces while keeping electrical safety in mind.
Important safety note: Always unplug the toaster and allow it to cool completely before cleaning. Never immerse an electric toaster in water, and avoid getting excessive moisture near the electrical components or heating elements.
Why Deep Cleaning Your Toaster Matters
Your toaster may seem like a simple appliance, but it can collect a surprising amount of food debris over time.
Bread crumbs can fall into the interior, while butter, grease, dust, and other kitchen residue can accumulate around the outside. If the crumb tray isn’t emptied regularly, old debris can continue building up inside the appliance.
Regular kitchen appliance maintenance can help keep your toaster cleaner and easier to maintain.
It can also make everyday kitchen cleaning much less frustrating because you won’t have to deal with years of accumulated grime all at once.
What You’ll Need to Deep Clean a Toaster
Before starting, gather your cleaning supplies so you don’t have to stop halfway through the process.
Cleaning Supplies
- Dish soap or a suitable kitchen degreaser
- White vinegar
- Baking soda
- A soft toothbrush or small cleaning brush
- Microfiber cloths or soft cleaning rags
- Cotton swabs
- A small bowl
- Warm water
- Paper towels
- A butter knife or flat-edged tool for exterior scraping only
- A trash bin or newspaper for collecting crumbs
For regular home cleaning and appliance care, microfiber cloths, soft brushes, and mild dish soap are useful household supplies to keep available.
Step 1 — Empty and Clean the Crumb Tray
The crumb tray is one of the easiest places to start because it often contains a large amount of accumulated food debris.
1. Remove the Crumb Tray
Locate the crumb tray at the bottom of the toaster and slide it out carefully.
Place it over a trash bin before emptying it so loose crumbs don’t spread across your kitchen counter or floor.
2. Remove Loose Debris
Tap the tray gently over the trash bin to remove loose crumbs, burnt pieces, and accumulated debris.
If there is a thick layer of hardened residue, don’t try to remove everything immediately.
Let the cleaning solution do some of the work.
3. Soak the Tray
Place the crumb tray in warm water with a small amount of dish soap.
Allow it to soak for approximately 10 to 15 minutes.
This can help soften grease and dried food residue, making the cleaning process easier.
4. Scrub and Rinse
Use a soft cleaning brush or sponge to scrub the tray.
Pay particular attention to corners where crumbs and grease can collect.
Rinse thoroughly and place the tray somewhere clean and dry.
Do not put it back into the toaster while it is still wet.
Step 2 — Remove Interior Crumbs and Burnt Debris
Once the crumb tray is removed, it’s time to deal with the debris hiding inside the toaster.
This step requires extra care because the interior contains delicate heating elements.
Turn the Toaster Upside Down
Take the unplugged, completely cool toaster outside or over a suitable trash bin or sheet of newspaper.
Turn it upside down and gently shake it.
Avoid hitting or aggressively banging the appliance because internal components can be damaged.
You may be surprised by how many crumbs come out of a toaster that appears relatively clean from the outside.
Use a Soft Brush
For crumbs that remain inside the slots, use a soft toothbrush or small cleaning brush.
Carefully brush around the accessible areas without forcing the brush against the heating elements.
The goal is to loosen food debris—not to scrape the interior aggressively.
Avoid Metal Tools Inside the Toaster
This is especially important.
Do not insert metal knives, forks, screwdrivers, or other conductive objects into an electric toaster.
Metal tools can damage heating elements and create a serious electrical or safety hazard.
If something is stuck inside and cannot be removed safely, consult the manufacturer’s cleaning instructions rather than forcing it out.
What About Compressed Air?
If you have compressed air designed for cleaning electronics or appliances, it may help remove loose dust and crumbs from accessible areas.
Use it cautiously and follow the product instructions.
The goal is to remove loose debris rather than push it deeper into the appliance.
Step 3 — Clean the Exterior Grease and Stains
Once the loose crumbs are gone, focus on the outside of the toaster.
This is where grease, fingerprints, food splashes, dust, and sticky residue often become noticeable.
A clean exterior can make an old appliance look dramatically better.
Make a Simple Cleaning Solution
For general exterior cleaning, mix equal parts white vinegar and warm water in a small bowl.
Alternatively, put a small amount of dish soap on a damp microfiber cloth.
The cloth should be damp rather than dripping wet.
Remember that electric appliances should never be flooded with cleaning solution.
Wipe Away Surface Grime
Gently wipe the exterior of the toaster with the damp microfiber cloth.
Work slowly over areas with:
- Grease buildup
- Sticky residue
- Fingerprints
- Dust
- Food splashes
- Dried stains
For heavily soiled areas, repeat the process rather than using excessive pressure.
Use a Kitchen Degreaser Carefully
For stubborn grease on suitable exterior surfaces, a kitchen degreaser can sometimes make the job easier.
Apply the product to the cleaning cloth rather than directly flooding the toaster.
Allow the cleaner to work according to its label directions, then wipe the surface thoroughly.
Always check the manufacturer’s recommendations first, particularly for painted, coated, plastic, or specialty finishes.
Step 4 — Remove Tough Dried-On Stains
Some neglected toasters have old stains that don’t disappear with a simple wipe.
For suitable exterior surfaces, baking soda can be used to create a mild cleaning paste.
Make a Baking Soda Paste
Combine a small amount of baking soda with a few drops of water.
Mix until you have a thick paste.
Apply a small amount to the stubborn exterior stain.
Let it sit for several minutes, then gently scrub with a soft toothbrush or microfiber cloth.
Avoid aggressive scrubbing on delicate finishes because abrasive materials can scratch or dull certain surfaces.
Afterward, wipe the area with a clean, slightly damp cloth to remove the residue.
Step 5 — Clean Around Buttons, Dials, and Edges
Small spaces around buttons, controls, seams, and edges can collect a surprising amount of grime.
A cotton swab can make these areas much easier to clean.
Lightly dampen the swab rather than soaking it.
Run it carefully around the accessible edges of buttons and controls.
For stubborn buildup, use several clean swabs instead of forcing moisture into the appliance.
This small step can make a major difference to the overall appearance of your toaster.
Step 6 — Clean Chrome and Stainless-Steel Surfaces
Many toasters have chrome, stainless-steel, or other metal accents.
These surfaces can show fingerprints, water marks, grease, and light surface residue very easily.
For suitable stainless-steel or chrome surfaces, use a small amount of white vinegar on a soft cloth.
Gently wipe the surface, then immediately buff it dry with a clean microfiber cloth.
Avoid leaving moisture sitting on metal surfaces.
Also check the appliance manufacturer’s recommendations before using vinegar or any cleaning product on specialty finishes.
A Simple Deep-Cleaning Routine for Kitchen Appliances
You don’t need to wait until a toaster becomes heavily neglected before cleaning it.
A simple home maintenance routine can keep kitchen appliances looking cleaner for longer.
Try making these habits part of your regular household cleaning schedule:
- Empty the crumb tray regularly.
- Wipe the exterior whenever you notice grease or fingerprints.
- Remove loose crumbs before they accumulate.
- Keep the appliance away from excessive splashes.
- Check the manufacturer’s cleaning instructions.
- Inspect the cord and exterior periodically.
- Give frequently used appliances a deeper cleaning when necessary.
Regular maintenance is usually much easier than trying to remove months or years of accumulated buildup at once.
⚠️ Don’t miss the rest! The full article continues on the next page 👇📖
Tap “Next Page” to see all the details, tips, and surprises waiting for you!