in

Chocolate Peanut Butter Dream Bars

A plate of Chocolate Peanut Butter Dream Bars with a layered crust of chocolate, peanut butter, and creamy filling, topped with a smooth layer of chocolate ganache.
A tempting slice of Chocolate Peanut Butter Dream Bars, showcasing layers of rich chocolate, smooth peanut butter, and a creamy filling—sure to satisfy any sweet tooth!

Chocolate Peanut Butter Dream Bars – A Decadent Dessert with Layers of Chocolate & Peanut Butter

Chocolate Peanut Butter Dream Bars are the ultimate indulgence, with layers of creamy peanut butter, rich chocolate, and a crunchy cookie crust. This dessert is perfect for any occasion, offering a delightful combination of sweet and salty that everyone will love.

Why You’ll Love Chocolate Peanut Butter Dream Bars:

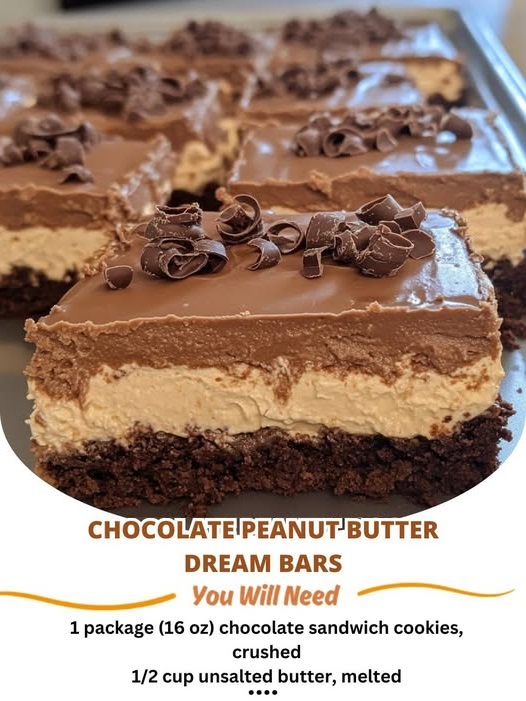
These bars feature a deliciously layered combination of crushed chocolate cookies, creamy peanut butter filling, and a chocolate pudding layer, all topped off with whipped topping and garnished with chocolate curls. They’re the perfect dessert for peanut butter and chocolate lovers alike!

  • Decadent Layers: A crunchy cookie crust, creamy peanut butter filling, and smooth chocolate pudding make for an irresistible dessert.
  • No-Bake: This recipe requires no baking, making it simple and quick to prepare.
  • Peanut Butter & Chocolate: The perfect combination of sweet and savory, sure to satisfy your cravings.
  • Easy to Make: With just a few ingredients and simple steps, these bars come together with ease.

Nutritional Benefits:

  • Peanut Butter: Provides healthy fats, protein, and fiber, making this dessert a bit more satisfying.
  • Whipped Topping & Cream Cheese: Give the bars a smooth and creamy texture that’s truly irresistible.
  • Chocolate: Offers a rich, satisfying flavor with the added bonus of antioxidants.

Ingredients for Chocolate Peanut Butter Dream Bars:

  • 1 package (16 oz) chocolate sandwich cookies, crushed
  • 1/2 cup unsalted butter, melted
  • 1 cup creamy peanut butter
  • 1 package (8 oz) cream cheese, softened
  • 1 cup powdered sugar
  • 1 container (8 oz) whipped topping, thawed
  • 1 package (3.9 oz) instant chocolate pudding mix
  • 1 1/2 cups milk
  • Additional whipped topping and chocolate curls for garnish

Step-by-Step Instructions:

  1. Prepare the Cookie Crust (Time: 5 minutes)
    In a medium bowl, combine the crushed chocolate sandwich cookies with the melted butter. Mix well until the crumbs are evenly coated with butter.
  2. Form the Crust (Time: 2 minutes)
    Press the cookie mixture into the bottom of a 9×13-inch baking dish, creating an even layer. Use the back of a spoon to press it down firmly. Place the crust in the refrigerator while you prepare the filling.
  3. Make the Peanut Butter Filling (Time: 5 minutes)
    In a separate bowl, beat together the creamy peanut butter, softened cream cheese, and powdered sugar until smooth and well-combined.
  4. Add Whipped Topping (Time: 2 minutes)
    Gently fold in the thawed whipped topping to the peanut butter mixture. Spread this creamy mixture evenly over the prepared cookie crust in the baking dish.
  5. Prepare the Chocolate Pudding Layer (Time: 3 minutes)
    In a bowl, whisk together the instant chocolate pudding mix and milk until it thickens, about 2 minutes.
  6. Assemble the Bars (Time: 5 minutes)
    Pour the chocolate pudding mixture over the peanut butter layer, spreading it evenly with a spatula.
  7. Chill the Bars (Time: 4 hours)
    Cover the dish with plastic wrap and refrigerate the bars for at least 4 hours, or until set. This step is crucial for the layers to firm up and make cutting easier.
  8. Garnish & Serve (Time: 5 minutes)
    Before serving, top the bars with additional whipped topping and chocolate curls for garnish.

Prep Time: 15 minutes

Chill Time: 4 hours

Total Time: 4 hours 15 minutes

Servings: 12-16

Calories: Approximately 250-300 per serving (varies based on portion size)

Tips for the Best Chocolate Peanut Butter Dream Bars:

  • Crust Consistency: Make sure the cookie crust is packed down tightly so it holds together well when sliced.
  • Whipped Topping: For the best texture, make sure the whipped topping is fully thawed before adding it to the peanut butter mixture.
  • Chocolate Curls: To make the chocolate curls, simply use a vegetable peeler on a bar of chocolate. You can also use chocolate shavings or sprinkles as an alternative.

FAQ About Chocolate Peanut Butter Dream Bars:

Q: Can I use a different type of cookie for the crust?
A: Yes! While chocolate sandwich cookies give a great flavor, you can use graham crackers, Oreos, or other cookies to create a different flavor profile for the crust.

Q: How should I store leftovers?
A: Store any leftover bars in the refrigerator, covered with plastic wrap or in an airtight container, for up to 5 days. They can also be frozen for up to 1 month.

Q: Can I make these bars ahead of time?
A: Absolutely! These bars are perfect for making ahead, as they need to chill in the refrigerator for several hours anyway. They can be prepared a day or two in advance.

Final Thoughts:

Chocolate Peanut Butter Dream Bars are a perfect treat for any occasion, offering a rich and creamy combination of flavors in every bite. With their no-bake convenience and indulgent layers, they’re sure to become a go-to dessert for your family and friends.

If you loved these Chocolate Peanut Butter Dream Bars, don’t forget to share the recipe with your friends and family! Leave a comment below and let us know how they turned out. Have fun experimenting with different cookie crusts or garnishes to make them your own!

A plate of Crockpot Angel Chicken featuring tender chicken pieces in a creamy, savory sauce with a hint of seasoning.

Crockpot Angel Chicken

A fresh Grilled Chicken Avocado Salad with grilled chicken slices, creamy avocado, mixed greens, and vibrant vegetables, drizzled with a zesty dressing.

Grilled Chicken Avocado Salad